Photo cropping system
Available from 3.1 version (07.03.2024)
The photo cropping system offers two modes that can be defined for products in your lab.
• Automatic mode
The application will prepare for you already cropped and print-ready files, taking into account a border or a Full photo mode optionally added by a customer.
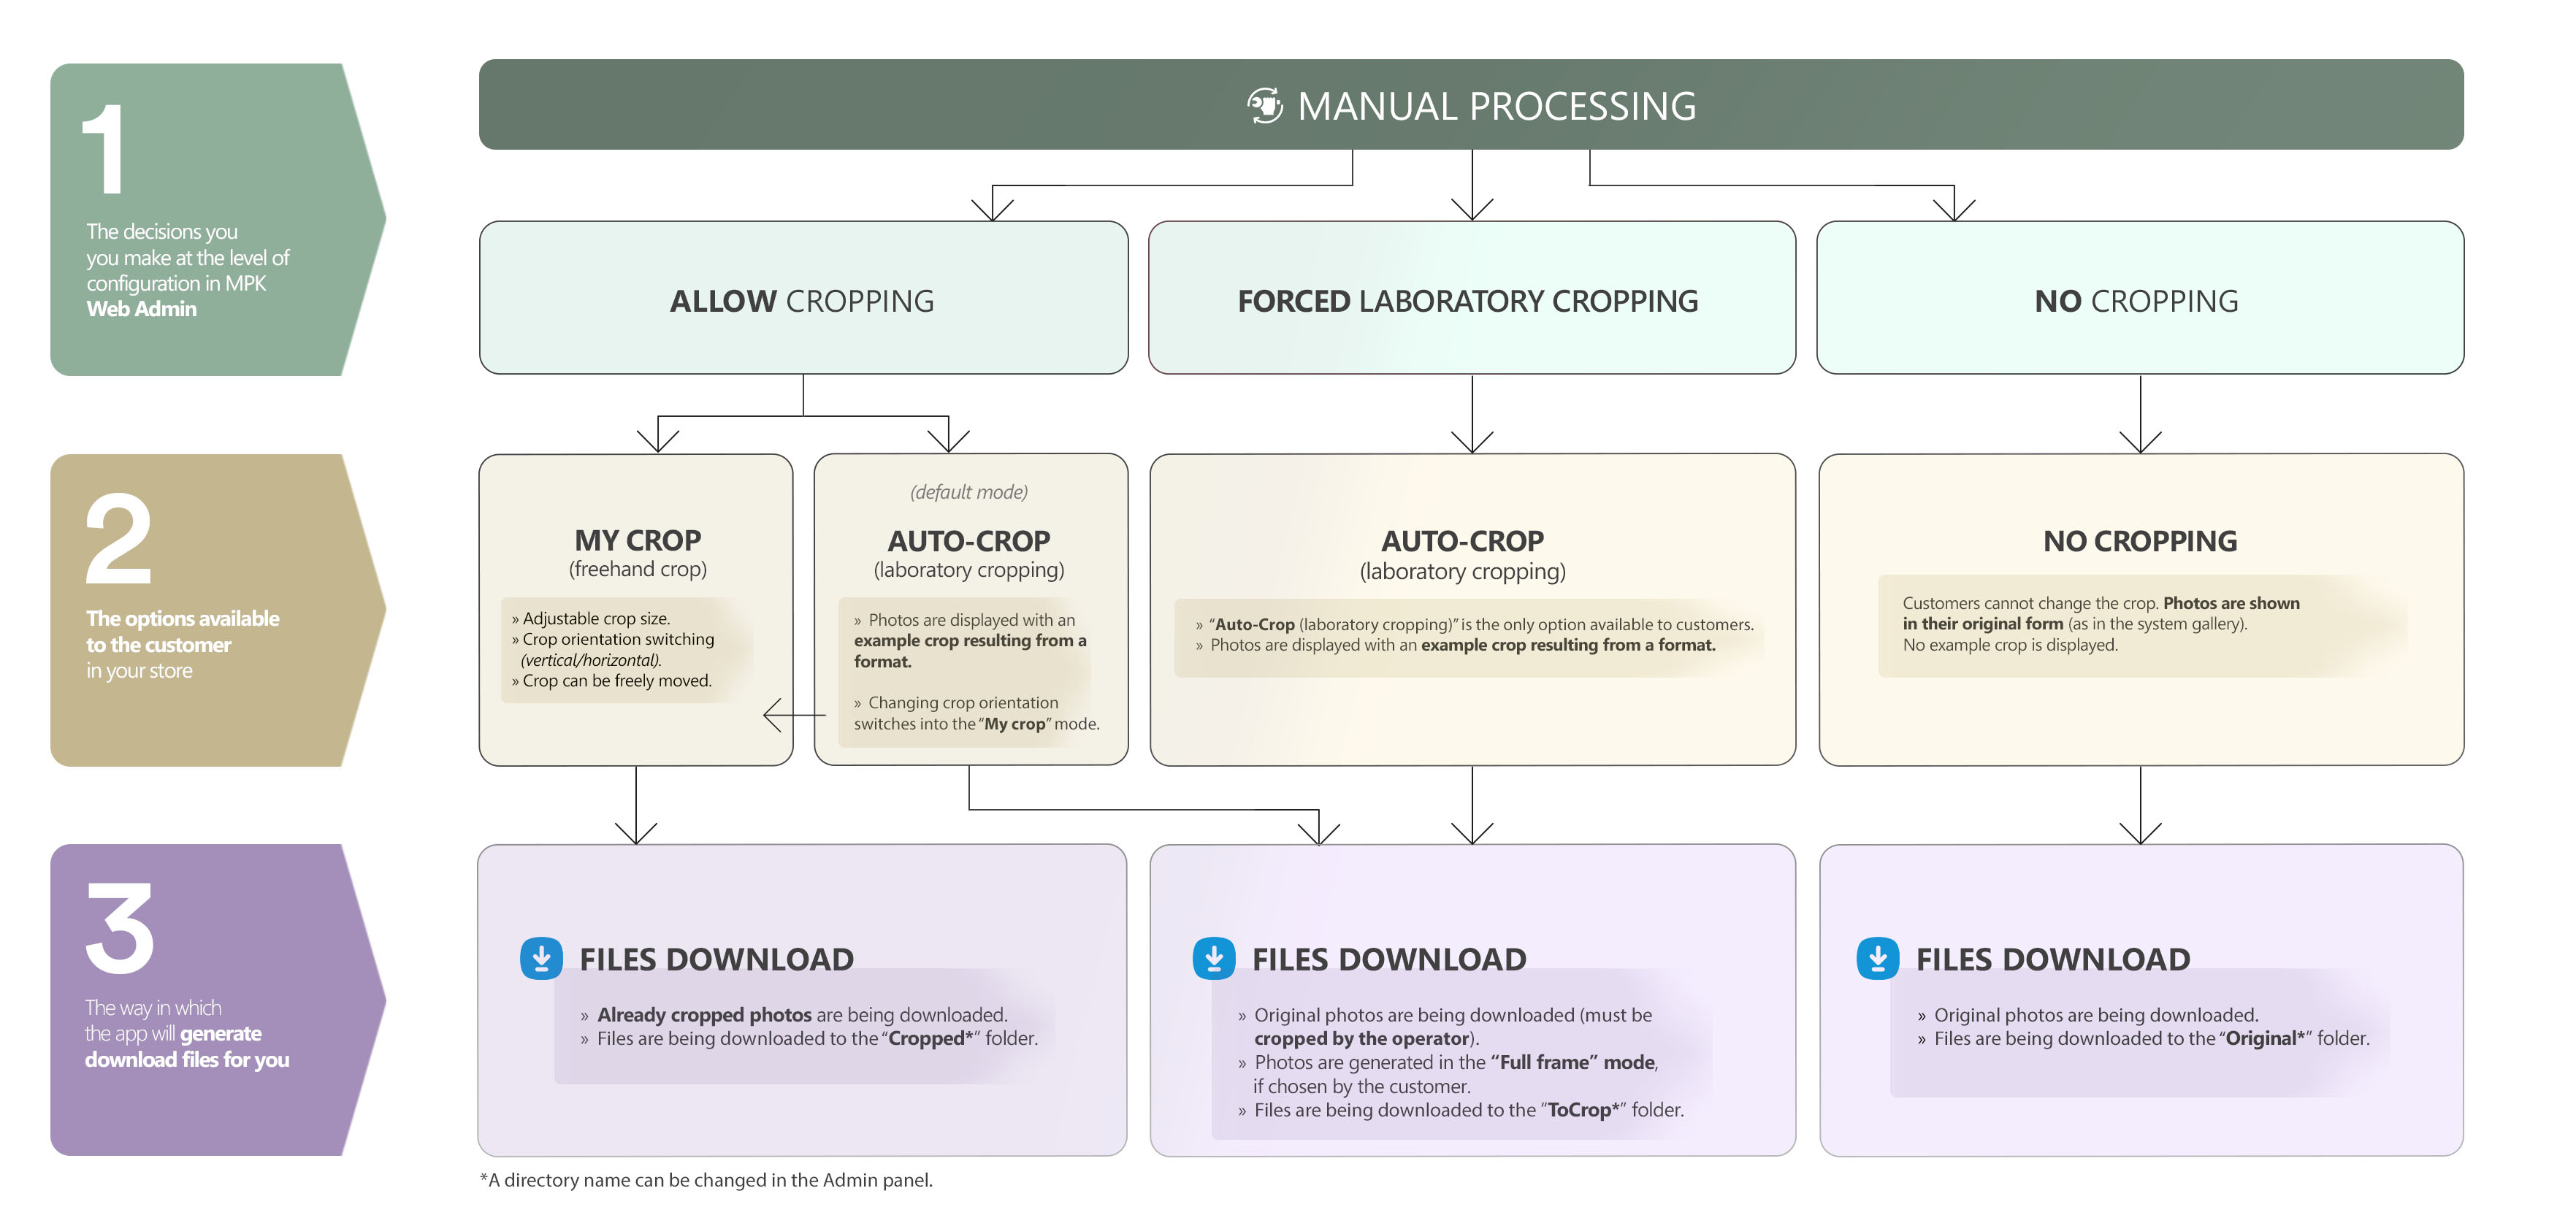
• Manual mode
You are responsible for adding a border on photos or printing them in a Full frame mode. The Manual mode also allows you to perform your cropping service for the customer – Auto-Crop (laboratory cropping) – in which you receive the customer’s un-cropped (original) photos. Border/Full frame/For cropping are distributed to the appropriate subdirectories according to your settings in the Admin panel.
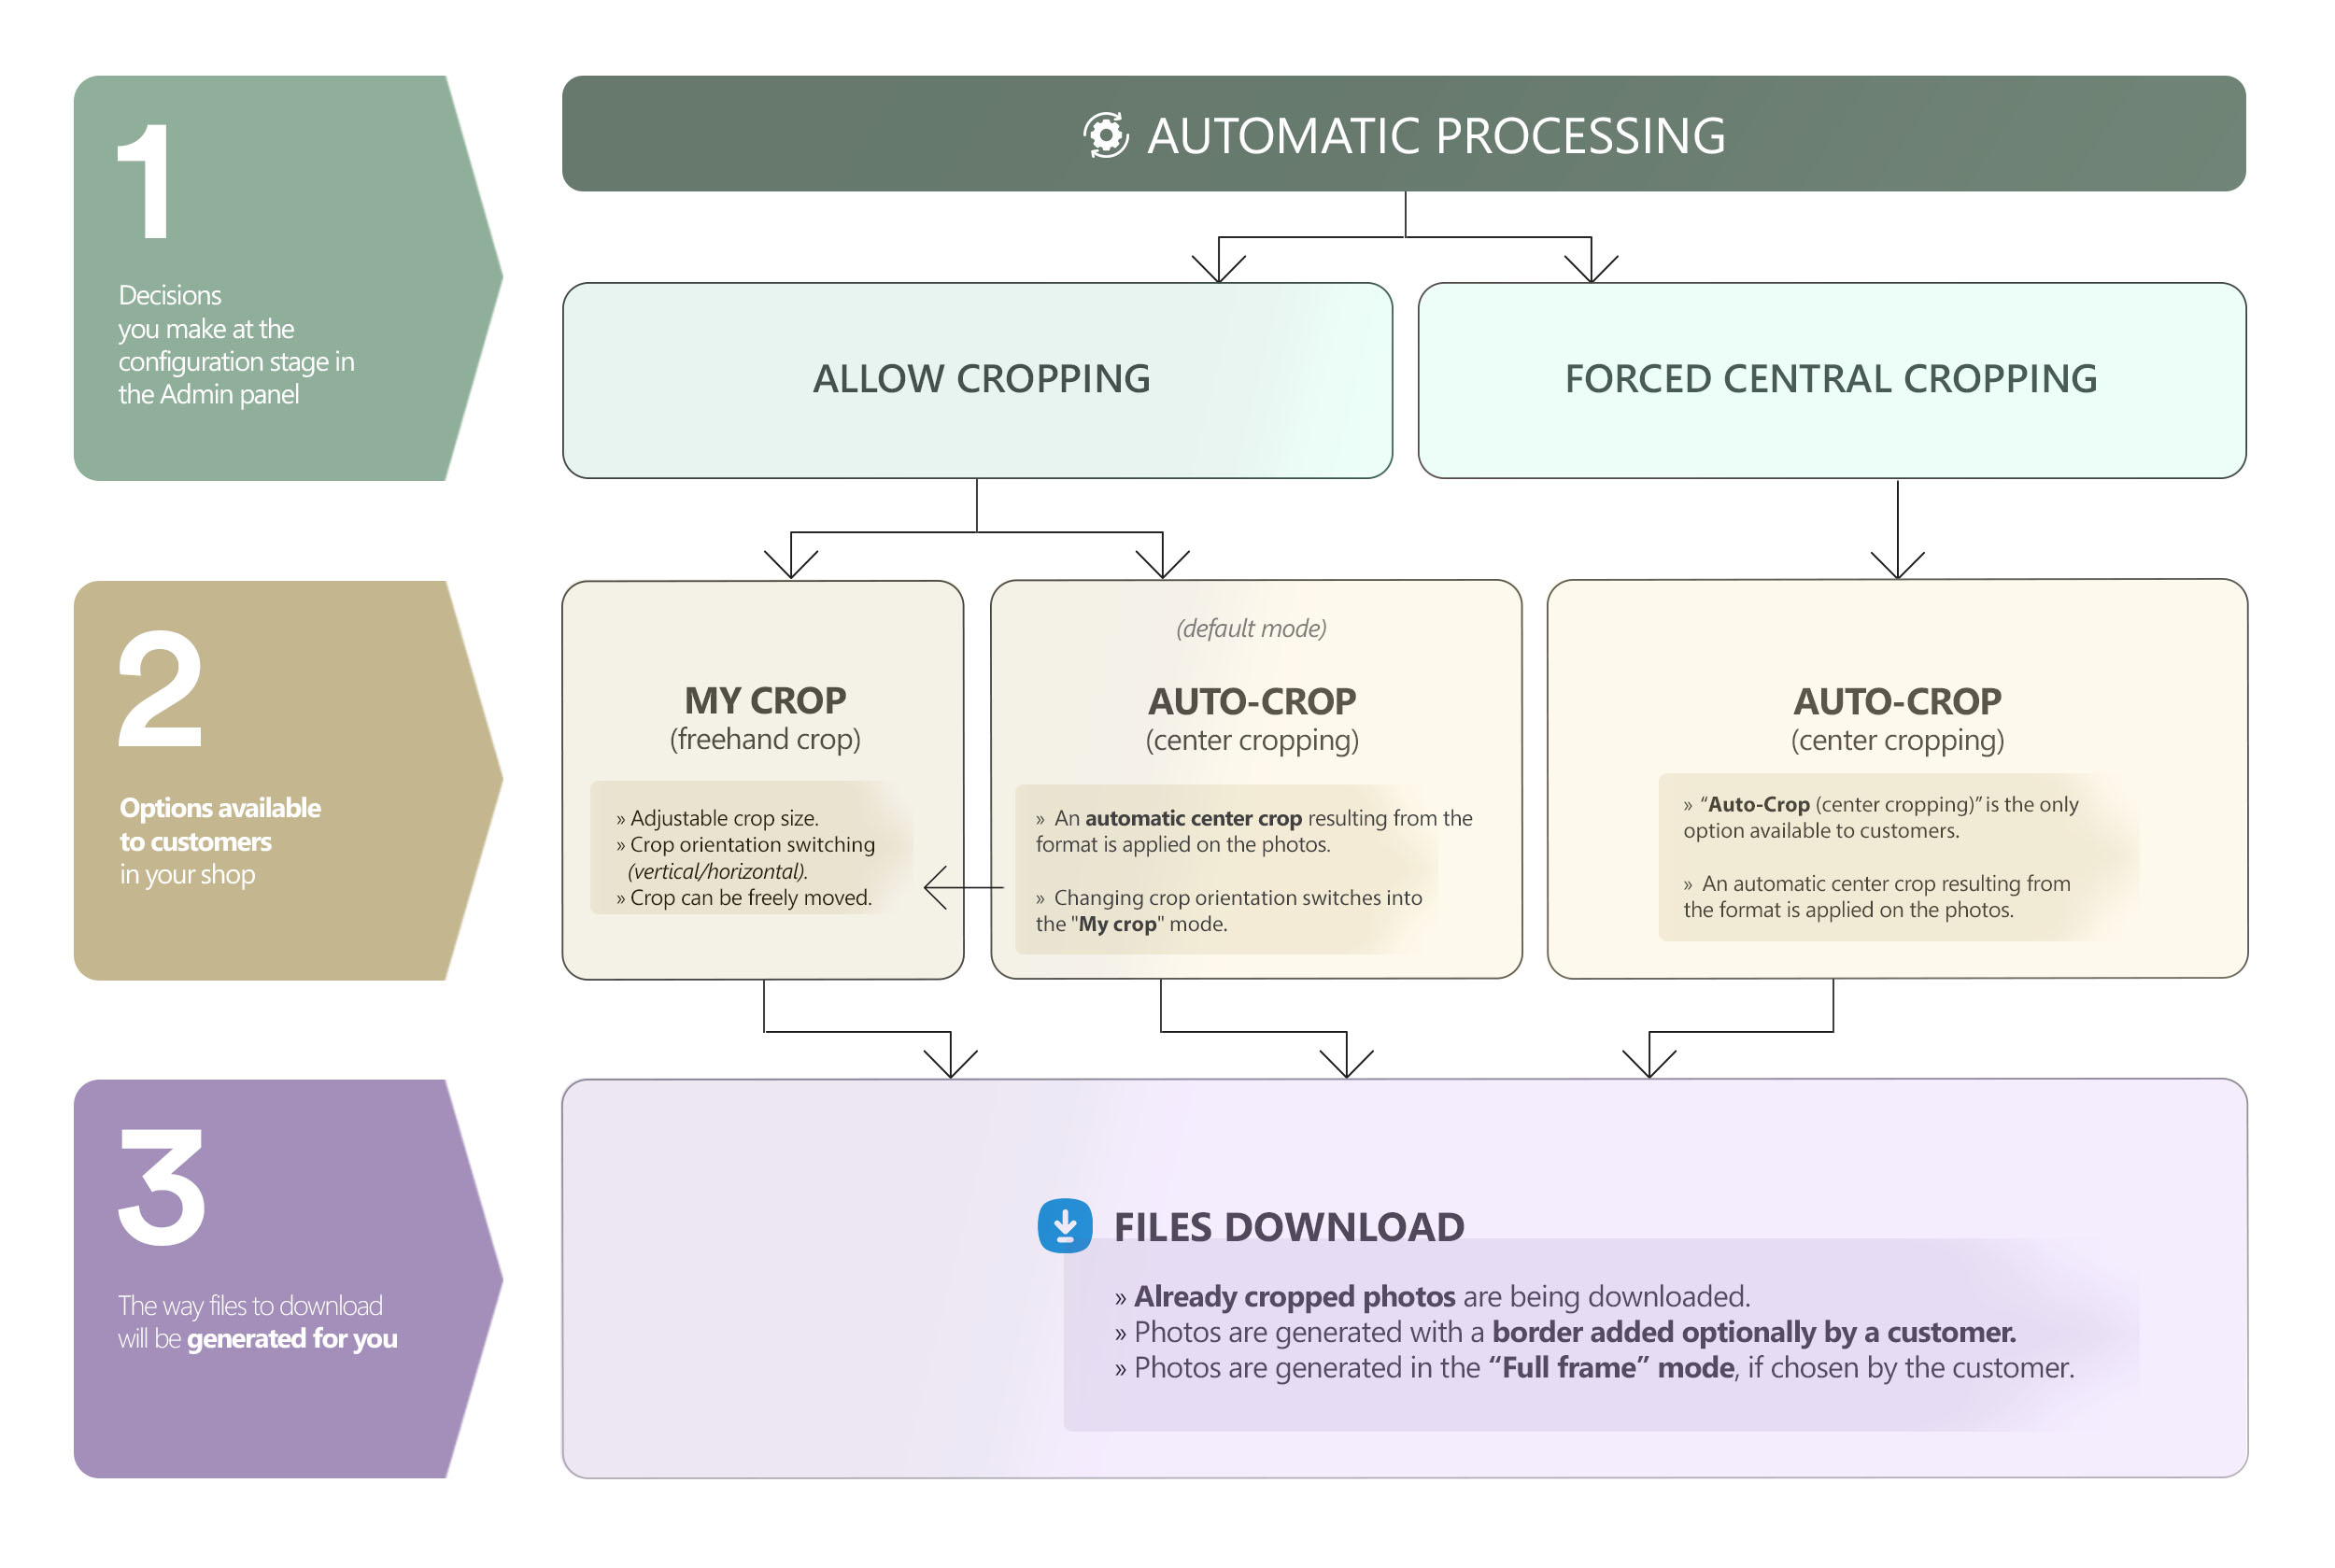
The impact of settings in the Admin panel on the options available to the customer and how you download the order
AUTOMATIC MODE:
MANUAL MODE:
How to configure the cropping system?
Log in to your Admin panel.
Go to “Settings” > “Products” (1) and select the product you are interested in by clicking on its tile. If you are using product categories, make sure to enter the edit window of a final one.

In the “Product Details Configuration” tab, configure three items:
1. “Photo processing mode” (2):
• “Automatic”, or
• “Manual”.
Depending on your selection, the following will be available:
2. “Crop”:
• “Allow cropping” – will impose either a central crop (Automatic mode) or a laboratory crop (Manual mode) on the photos, and allow customers to change the crop themselves if they wish. You will receive cropped, print-ready photos;
• “Forced central cropping” – will impose an automatic central crop on the photos, which customers cannot change. You will receive cropped, print-ready photos;
• “Forced laboratory cropping” – will impose your lab sample crop (resulting from the format) on the photos, the customer cannot change the crop. You will receive the original photos to crop yourself;
• “No cropping” – photos are displayed without an example crop (as in the system gallery), the customer cannot change the crop. You will receive the original photos to crop yourself.
3. “Full frame”:
• “Allow Full frame” (user’s choice) – the customer, while editing photos, can turn on the Full Photo mode himself;
• “Allow Full frame and set it as default” – the customer’s photos will be displayed in the Full frame mode, which he can turn off by himself;
• “Full frame not allowed” – there is no possibility to order photos in the Full frame mode (option not active for the customer).
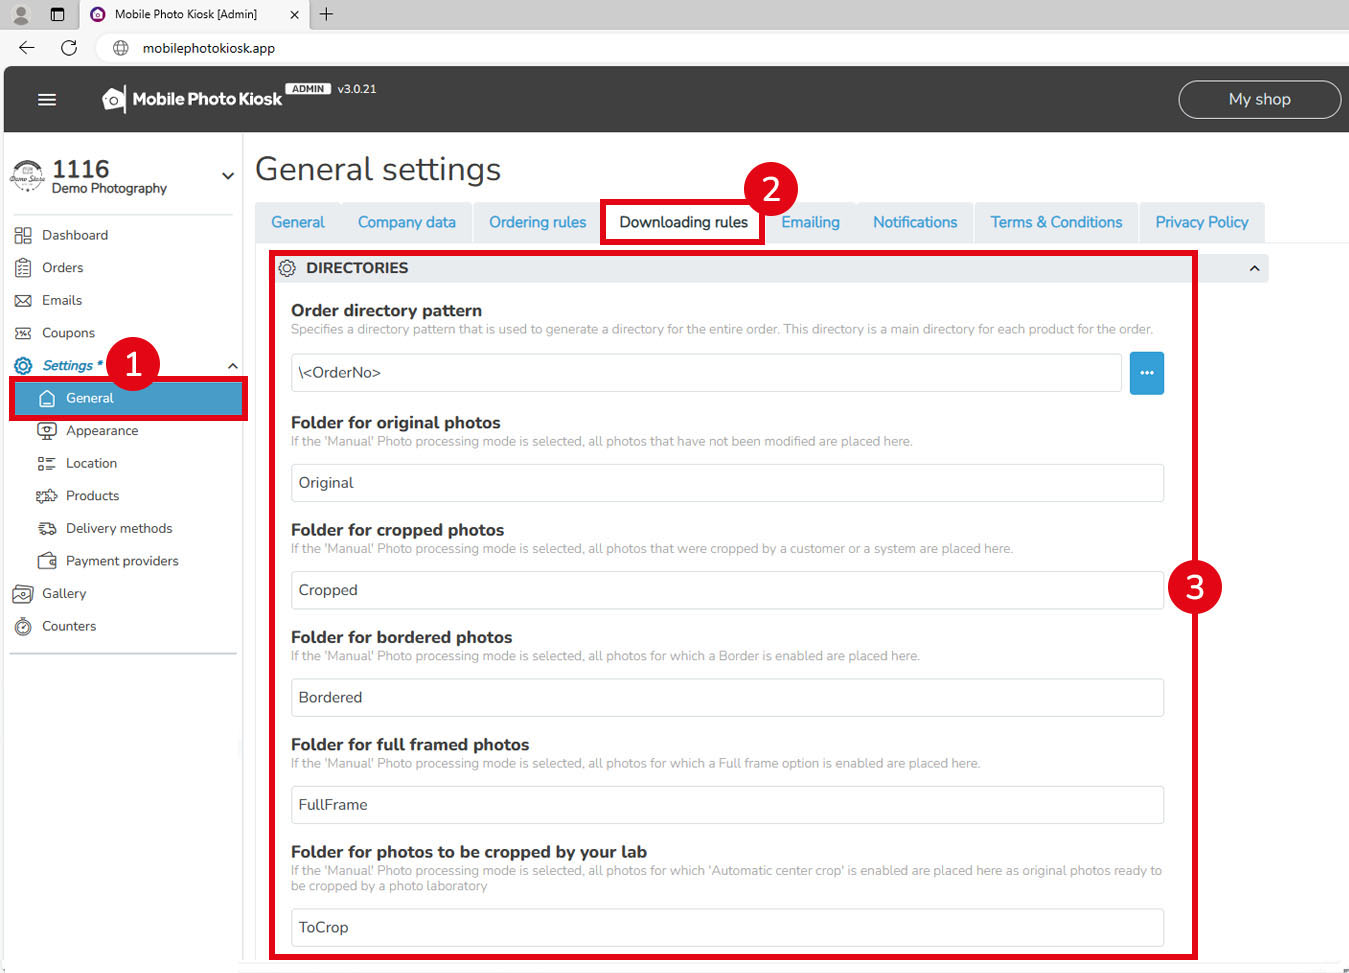
Where to define the names of folders to which order files will be downloaded?
Log in to your Admin panel.
Go to “Settings” > “General” (1) and select the “Downloading rules” tab (2). Then enter your own folder names in the appropriate fields (3):